राखी तयार करणे शिका
How to make a Rakhi using Craft Foam:
🎁 रक्षाबंधन स्पेशल मिठाई *"कलाकंद"* घरीच बनवा फक्त 3 वस्तू पासून !
➖➖➖➖➖➖➖➖➖➖
Step 1:
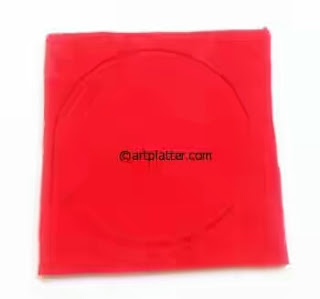
Take a piece of craft foam of medium thickness – cut it in the shape of a square.
This is for the inner/second layer of the rakhi, so the size of the piece has to be according to that.
Step 2:
Draw a circle on the foam piece.
Cut out along the circle outline drawn. I have used a scissor that cuts in a wavy pattern for a ‘cooler’ effect.
Here is the piece after it has been cut out.
Step 4:
Repeat the above steps to make a bigger piece for the bottom layer of the rakhi.
Step 5:
Fold this piece that we cut out in step 4 in half and make two cuts spaced out from each other. The depth of each cut can be about 0.5 cm.
Can you see the cuts? I guess not…they are at the points where the arrows indicate.
Step 6:
Now open up the fold. Insert a satin ribbon in one slit…
…and bring it to the top through the other slit.
Note: Seal the ends of the satin ribbon by exposing the ends to an open flame and then give the ribbon to your kids.
Step 7:
Flip this yellow piece.
Step 8:
Apply glue on the smaller red piece. (I’m referring to the colors so that it is clear)
Step 9:
And glue the pieces together.
Step 10:
A pretty embellishing sticker is glued on top. Alternatively big colorful buttons can be used.
Very simple, wasn’t it?
And yeah..this technique can be used to make colorful friendship bands too! Just a little different designing here and there should do the trick.
======================================================================
दूसरा प्रकार २
Step 2:
Folds completed…
Step 3:
Step 4:
Step 5:
======================================================================
दूसरा प्रकार २
How to make an easy rakhi using card stock – Tutorial
Step 1:
Draw a circle on a sheet of colored handmade paper.
Step 2:
Cut out along the outline drawn.
Step 3:
Make fringes along the outline of the circle by making even cuts as shown. Fringing scissors can be used here.
Make such cuts with equal depth – the base of the rakhi is done.
Step 4:
Apply glue along the center of the circle as shown.
Step 5:
Place a string/thread on the glue applied and press so it sticks well.
Step 6:
Make a rosette (accordion flower style) using a strip of card stock. The steps to make this rosette have been provided here.
Steps to make Accordion Flowers using card stock:
Step 1:
Cut out a strip of paper or card stock.
Step 2:
Start making uniform fan folds on the strip.
Folds completed…
Step 3:
Glue on the two ends of the strip together.
You will get the below ring like structure.
Step 4:
Bring the ring together.
Step 5:
Glue on a circular piece of card at the center.
Flip and glue on another circular piece – hold firmly for a couple of minutes till the shape is secure.
The flower is done.
You can glue on buttons, sequins or any such embellishment at the center for a fancier look.
The rosettes can be made in big sizes and used as decor; you can attach a piece of string and you have pretty Christmas ornaments too!
Embellish the center of the rosette with a rhinestone.
Step 7:
Glue the accordion flower on top of the circle base and press well. Allow the glue to dry.
Step 8:
You can either finish with the above step or add a bit more sparkle with a line of small golden rhinestones.
Once the rhinestones are glued – the completed rakhi…


खूपच छान रक्षा बंधन शुभेच्छा संदेश व्हाट्सअप्प स्टेटस
ReplyDelete